Detailed setup page 3
My astrophotography setup in more detail page 3
-
Now that we have north aligned the telescope/mount (previously) and are able to navigate in the universe( go-to by platesolving) we need to make sure that the telescope/mount can autoguide by tracking a star or several stars. When the stars tend to drift and this is detected by the guidescope/PHD2 an error correction signal is sent to the mount, thereby commanding it in the right direction keeping the stars and object fixed . With this feature, I am able to take longer exposures and prevent the stars in the picture from trailing. The quality of the guiding adjustment is essential for a good picture and I always make and effort in making the best possible guiding setup. This is done by running an calibration test of the actual rig-setup( parameters/mount/backlash /guidingscope etc.)
-
When the autoguiding is acceptable I am ready to find my object and run my astrophotography session.
-
In Stellarium I search for my object(eg M31)In N.I.N.A. I sync this object with all its attributes( position etc.) to N.I.N.A. N.I.N.A. has its own object database so Stellarium is not essential but I like the visual presentation in this app. In Nina I ad my target and define how many pictures, exposure time, ISO etc. and setup guiding, center object etc. and hit run, this starts the capture session and while I observe I can sit back and drink some coffee. The pictures are automatically stored on my computer.
-
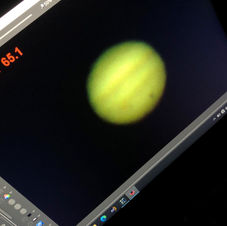
For planetary sessions it is almost the same procedure with only a few exceptions, I use the software “Firecapture” which is designed for capturing objects like the planets in our solarsystem while N.I.N.A is intended for Capturing DSO and long exposures. Together with Firecapture I use a dedicated Planetary camera like my ZWO ASI 485MC. This camera is extremely sensitive and acts more like a videocamera compared to a normal DSLR camera.
Ending the session
-
When the battery power is low its time to end the session but we need to take some calibration photo frames. I use the built-in module “frames” in N.I.N.A. and take a number of Flats and Dark Flats calibration frames.
-
Now its time to park the telescope and power off all the equipment and wrap it up.
Unpacking equipment and drying
When unpacking all my equipment I make sure that all equipment will be properly dried and free of any moist/water/ice. I also make sure that Batteries are fully charged before my next Night session.
Transfer data
When the PC has reached ambient temperature and external powersupply is pluged in, I transfer all the data to a USB Hardisk.
Data processing
In this step, the result of my effort will be revealed. I use different software to post process the pictures depending on the objects(planets or Deep sky objects) This is my software collection which consists of paid software and freeware applications.
DSS- Deep Sky Stacker
Final result
The final picture is now ready and done. Maybe You are satisfied, maybe not, The process of astrophotography involves so many steps where one only can learn and improve, this will lead to better finale results. I have learned much about weather condition and the great impact it has on photographing the objects in the night sky, The equipment and the adjustment to obtain the right setup, The photo session where it makes a difference whether You use the optimal ISO and exposure on the camera, the post processing of the pictures and getting all the data extracted and exposed. I don’t think that I will ever get tired of this hobby of imaging "things of the past".
- It’s easier than you might think-
Guiding and imaging
Planetary imaging


